Sunday, November 11, 2018

Halloween Room Transformation~The Raven

Since I teach with IReady Florida and we were pretty much on pace with the curriculum we were studying poems during the week of Halloween. Not just poems, finding the theme of a poem.  Halloween is a half day and crazy. So I decided I would just add to the crazy and do a spooky room transformation and read The Raven by Poe. I was worried about the scaffolding I thought I would have to do.
 

Turns out my kiddos didn't need all that much scaffolding. And they totally nailed the theme. The discussion they had about the guilt vs. loss the narrator felt was amazing. I am still in awe. 

If you haven't done a room transformation yet I highly recommend you do. I was doubtful about how my kids would react but they were so engaged and receptive to my lesson it made a believer out of me. 


All it took was 4 black table cloths, some electric candles and a few fake bones from the Halloween section of the dollar tree.  All in all I spent $8 on the transformation. But I plan on using the table cloths for a book tasting transformation....yes I'm hooked. 


I printed the poem for each of the kiddos from the poetryfoundation.org they have a great no nonsense platform and I was able to get the full poem down to three pages with tons of room to make notes in the margins etc. 

Sunday, May 17, 2015

Summer Reading

What do you do to encourage your students to read over the summer? 

I notice a massive amount of regression in some of my students if they don't do summer reading.  So this year I am thinking of doing something fun with summer reading.  I found a bunch of FREE resources from Scholastic. 

I picked up their reading list:  HERE
And the summer book bingo: HERE
And I signed us up for the Scholastic Summer Reading Challenge HERE

I am just working on what prizes I will give out for my kiddos.  I am thinking of doing something small for reading just one book then coming up with more and more awesome things to give based on larger amounts of reading. 

What do you do to encourage your kids to read over the summer? 

http://katiesbookblog.com/wp-content/uploads/sites/18/2014/04/summer-reading-logo-clear-background.png

Sunday, July 6, 2014

Forming Forms?!?

So, I created my first editable form from word today.  No Thanks to my technology class..
So I thought that I would share!  You can download it free from my TPT store by clicking on the link below.     :)

http://www.teacherspayteachers.com/Product/Pirate-themed-Open-House-Form-1310394


Oh have I mentioned that I will be teaching fourth grade next year?  ESE fourth grade?

I have copied and pasted the directions for making your own forms on the newest version of word below if you are interested. It's really easy once you get the hang of it just highlight and click!

DIRECTIONS FROM WORD FOR CREATING A FORM:

To create a form in Word that others can fill out, start with a template and add content controls. Content controls include things like check boxes, text boxes, date pickers, and drop-down lists. If you’re familiar with databases, these content controls can even be linked to data.
Creating a fillable form begins with six basic steps. Let’s walk through them below.

Step 1: Show the Developer tab

  1. Click the File tab.
  2. Click Options.
  3. Click Customize Ribbon.
  4. Under Customize the Ribbon, in the list under Main Tabs, select the Developer check box, and then click OK.
    Customize Ribbon dialog

Step 2: Open a template or a document on which to base the form

To save time, start with a form template. To start from scratch, start with a blank template.

Start with a form template

  1. Click the File tab.
  2. Click New.
  3. In the Search online templates box, type the type of for you want to create and press ENTER .
  4. Click the form template that you want to use, and then click Create.

Start with a blank template

  1. Click the File tab.
  2. Click New.
  3. Click Blank document.

Step 3: Add content to the form

On the Developer tab, click Design Mode, and then insert the controls that you want.
Design Mode button
 Note   You can print a form that was created using content controls, but the boxes around the content controls will not print.

Insert a text control where users can enter text

In a rich text content control, users can format text as bold or italic, and they can type multiple paragraphs. If you want to limit what users add, insert the plain text content control.
  1. Click where you want to insert the control.
  2. On the Developer tab, click Rich Text Content Control Ribbon image or Plain Text Content Control Ribbon image.
To set specific properties on the control, see Step 4: Set or change properties for content controls.

Insert a picture control

A picture control is often used for templates, but you can also add a picture control to a form.
  1. Click where you want to insert the control.
  2. On the Developer tab, click Picture Content Control.
To set specific properties on the control, see Step 4: Set or change properties for content controls.

Insert a building block control

Use building block controls when you want people to choose a specific block of text. For example, building block controls are helpful if you’re setting up a contract template, and you need to add different boilerplate text depending on the contract’s specific requirements. You can create rich text content controls for each version of the boilerplate text, and then you can use a building block control as the container for the rich text content controls.
You can also use a building block control in a form.
  1. Click where you want to insert the control.
  2. On the Developer tab, in the Controls group, click a content control:
Building block controls
To set specific properties on the control, see Step 4: Set or change properties for content controls.

Insert a combo box or a drop-down list

In a combo box, users can select from a list of choices that you provide or they can type in their own information. In a drop-down list, users can only select from the list of choices.
  1. On the Developer tab, click Combo Box Content Control Button image or Drop-Down List Content Control Button image.
  2. Select the content control, and then on the Developer tab, click Properties.
  3. To create a list of choices, click Add under Drop-Down List Properties.
  4. Type a choice in the Display Name box, such as Yes, No, or Maybe.
Repeat this step until all of the choices are in the drop-down list.
  1. Fill in any other properties that you want.
 Note    If you select the Contents cannot be edited check box, users won’t be able to click a choice.

Insert a date picker

  1. Click where you want to insert the date picker control.
  2. On the Developer tab, click the Date Picker Content Control.
To set specific properties on the control, see Step 4: Set or change properties for content controls.

Insert a check box

  1. Click where you want to insert the check box control.
  2. On the Developer tab, click the Check Box Content Control.
To set specific properties on the control, see Step 4: Set or change properties for content controls.

Step 4: Set or change properties for content controls

Each content control has properties that you can set or change. For example, the Date Picker control offers options for the format you want to use to display the date.
  1. Click the content control that you want to change.
  2. On the Developer tab, click Properties, and change the properties that you want.

Step 5: Add instructional text to the form

Instructional text can enhance the usability of the form you create and distribute. You can change the default instructional text in content controls.
To customize the default instructional text for your form users, do the following:
  1. On the Developer tab, click Design Mode.
  2. Click the content control where you want to revise the placeholder instructional text.
  3. Edit the placeholder text and format it any way you want.
  4. On the Developer tab, click Design Mode to turn off the design feature and save the instructional text.
 Note   Do not select the Contents cannot be edited check box if you want form users to replace the instructional text with their own text.

Step 6: Add protection to a form

If you want to limit how much others can edit or format a form, use the Restrict Editing command:
  1. Open the form that you want to lock or protect.
  2. Click Home > Select > Select All, or press CTRL+A.
  3. Click Developer > Restrict Editing.

Monday, June 2, 2014

Are you Smarter than the FCAT?

Well are you?!?  The FCAT is Florida's standardized test as of now (although that may change in the coming year...).  As I was backing up my documents today because it's the end of the year and that's just what you do :)  I noticed that I have some lovely PowerPoint Games for FCAT prep.  I had 4 days worth of Are you Smarter than the FCAT? for grades 3-6.  They have Reading, Math, and Science questions on them.  You can check them out at my TPT store HERE or by clicking on the picture below. 


http://www.teacherspayteachers.com/Product/Day-1-Are-you-Smarter-than-the-FCAT-1263584


I hope you find some treasures as you are preparing for the end of the school year too!!!

Happy Hunting!

Friday, May 16, 2014

The Fantastic Flying Books of Mr. Morris Lessmore Common Core Lesson

My Aunt Robin sent me this book The Fantastic Flying Books of Mr. Morris Lessmore a year ago and it was fantastic.  So this year I read it to them again and we kicked it up a notch and it was marvelous.  The heavens shined their awesomeness upon us and there were unicorns and rainbows!  So I need to share!


First of all, let me tell you about this amazing book.  The book begins with Morris Lessmore in New Orleans (it doesn't say that so INFER) and suddenly a hurricane hits and Morris looses everything including the words in his book and his motivation in life.  He stumbles upon a flying lady and some flying books and is lead to a library.  He finds himself, happiness, and helps the books out until he is a very old man.  Then he too flies away and someone new stumbles upon the library. 

There are so many lessons that you can do just reading this book aloud with your kids.  There are some amazing vocabulary words that you can dig into.  There is ample opportunity to infer about New Orleans, Katrina, Morris' feelings, and the cycles you see in the book.  This books has Social Studies and Science embedded into it with New Orleans and the Hurricane.  Your children will want to "write of their joys and sorrows, of all that they know and everything that they hope for" (a repetitive line in the book) after reading this.  It's common core it's interesting its amazing. 

Then there is the technology!  There are TWO apps for this book.  One from Imag.N.O.Tron and one from Moonbot books.  The Moonbot app allows you to hear the book read and interact with it on the Ipad (or whatever device you download to) AND it has the ACADEMY AWARD WINNING SHORT FILM that goes along with it!!!!  You can compare and contrast the book and the movie.  The app helps the kids understand the book better with the animation, another person besides you reading it, and gives them an interesting rereading.  The Imag.N.O.Tron app has you use the camera in your device over the book to interact with it.  It also reads the book to the children, plays music, etc.  Both apps allow you to integrate a music element to your classroom through the song Pop Goes the Weasel. 

If you don't want to buy the apps the movie is available online.  I found a great blog post by My Bookshelf that review the book and has a link to the movie.  You can find that here

The reason I think that the work my students produced was so amazing this year was because of the technology.  I think that it took their engagement and therefore their work up a thousand notches.  Their writing was excellent, their reading response journals amazed me, and just the conversations about the book/movie/apps/etc was impressive.  If you need more lesson ideas you can go to teachingbooks for some more ideas. 

My kids even made another IMovie.  I told you last post that I was obsessed right?!?  My third graders did a great job I think. 


Monday, May 5, 2014

iMovie in the classroom

I have a new obsession, iMovie!  I was recently shown an iMovie trailer during a presentation and boy did my light bulb go off!  My kids could do summaries and act out or draw their books to make a trailer for a book.  They could make biographies or autobiographies...

Here are the summaries that my two classes made about the book Just A Dream by Chris Van Allsburg.

My homeroom's book trailer:


My second period's trailer:


So download iMovie and make your own trailer with your kiddos!  Feel free to share!!


Sunday, March 2, 2014

Reading Task Cards for Fables

So I have really gotten onto the task card trend.  I have seen and downloaded many on teachers pay teachers but I just couldn't quite find ones that meet my needs and really isn't it all about me.  So I have taken the plunge and made my own.  The link below goes along with the task cards on teachers pay teachers that I have created.  The cards go along best with fables, myths, legends, fairy tales, and tall tales but I am sure that you can adapt them to your needs.  I mostly made them to coincide with the ridiculously hard FCAT NGSS question stems but they go along nicely with the common core if you are already integrated.

http://www.teacherspayteachers.com/Product/Reading-Fables-Task-Cards-1142700


Happy reading!

Erin

Tuesday, December 4, 2012

Hanging Nameplate

For this make-it Monday I am sharing the nameplate that I made for my dearly departed intern.

All you need is some spray paint, puffy paint, wire (from the jewelry making section in your favorite craft store), piece of wood, drill with probably a 5/64" drill bit, and a hot glue gun.

First spray paint and puffy paint to your little heart's desire and let dry.


  Then turn your name plate so that the top is facing you.


Mark the two spots where you want the holding wire to be.  Now before you drill you need to be absolutely sure that your paint is dry, and even then if you used the glitter spray paint prepare yourself for a glittery hand.  And yes in case you were wondering glitter is the herpes of craft supplies....but it's sooooooo worth it! Drill away!


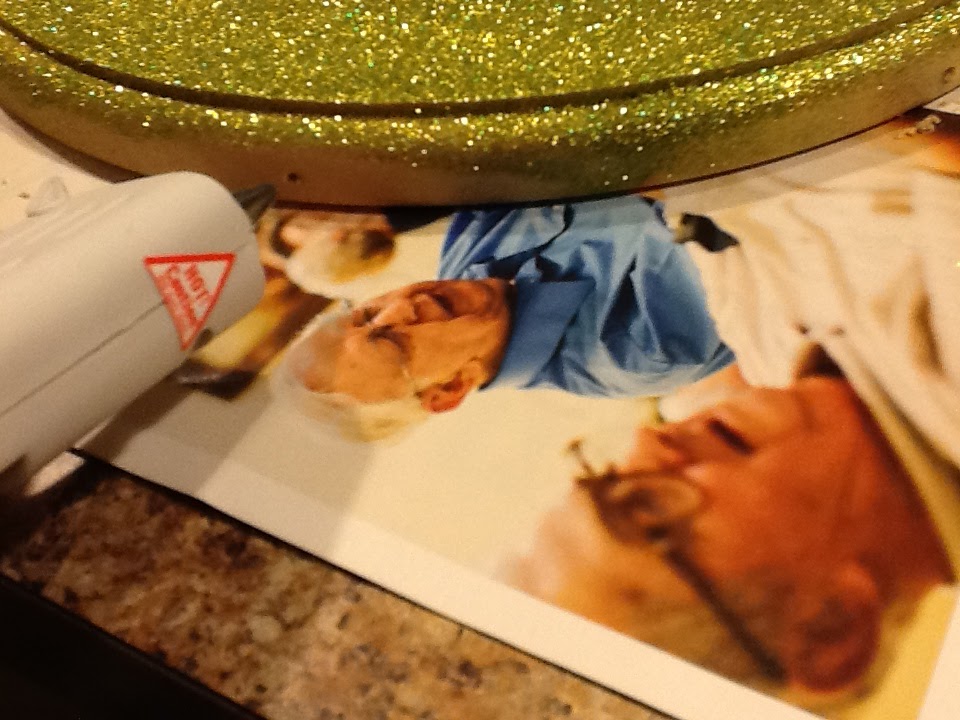
Then grab your hot glue gun and squirt some hot glue in the hole you just drilled. Immediately put your wire into the hot glued hole. You may want to hot glue around the outside of where the wire and the drilled hole meet just to make sure it stays put!


Now all you have to do is wait patiently for the hot glue to dry and you're all done!

Monday, December 3, 2012

Bloggerstration

So apparently google doesn't want me to start a post in the morning and finish it later.  I go back to my post in the evening  and I get a loading error message!  Serves me right for trying to use time management to get everyone done in a day....

I am experiencing bloggerstration!

Yes I did make that word up and yes you can use it!

Friday, November 30, 2012

I Want My Hat Back common core lesson


Awesome Common Core Book Experience Ahead!


When I say common core book what I mean that the book in my hands reaches the balance of being a quality piece of literature, the tasks that go along with the book are meaningful (not just color and paste), and the quantity of words in the book are at a sufficient level for the grade (which is going to be harder than it used to be). At least that's my abbreviated version of the common core requirements of qualitative, quantitative, reader and task orientation towards text complexity (and I spent four repetitive mind-numbing long days in Orlando at the common core conference getting that drilled into me knowledge).

My Aunt gave me this AWESOME 2nd-3rd grade common core book called I Want My Hat Back by Jon Klassen. In the book bear is looking for his hat and he politely asks all the animals if they have seen his hat. They all tell him no, sorry even thought he rabbit is clearly wearing the hat. The rabbit even goes into this long speech about how he would never steal hats... At the very end the bear realizes who has his hat, gets really mad and then you suddenly see him wearing the hat. A squirrel then asks the bear if he has seen a rabbit wearing a hat and the bear goes into a long winded explain action about how he would never eat a rabbit. The end. You don't really know if the bear eats the rabbit and the book ends suddenly.

So there are several lessons that you can get into about this book. First of all, it is a fantastic book to use when teaching inferring and character analysis. My kiddos surprised me about how deeply they were thinking about I Want My Hat Back. There was a discussion about whether the bear sat on or ate the rabbit. They discussed the cyclical nature of the bear's reaction (and then later possibly the squirrel's reaction). We discussed the social implications of what the rabbit and bear did. They also brought up how they know people who do what the rabbit did and how they all have different reactions. Then of course we analyzed the main characters of the book. We also talked about the illustrations and how they relate to the book. We even talked about the dialogue between the characters and quotation marks.


When I read the book I broke up the discussion into three minilessons: character analysis, social skills, and grammar. It worked out really well having a round of daily five work (centers) in between each discussion. I think it gave them time to form their thoughts and think of support for their answers. All in all this is a great book to read with students that really gets them thinking.

Monday, November 26, 2012

Technology Tuesday: Classroom Dojo

So I love technology and there's no denying it that kids these days really respond to it. I am also ALWAYS looking for the new 'answer to classroom management.' So when I saw class dojo I was totally excited!

Class dojo is a great FREE program that helps monitor classroom behavior. You set up each student in the system. You can even arrange them to correspond with your seating chart in the classroom. Then you can give them points based on their behavior, good and bad! They get and receive points that are instantly displayed. You can even customize what they gain or lose points for (the behaviors). However, like any technology there are positives and negatives to the program.

Positives: The program is extremely user friendly! It's very easy to set up your own class. Ted students can login at home and see their progress. Parents can login and see their student's progress. You can take attendance with the program. There are some really informative reports that you can print/show to parents. I could even see these reports being used for RTI purposes.

It is very motivating for the students to behave when the whole class sees how many points they do or don't have. There is even a cute video that you can show the kiddos that explains how the system works.

And did I mention that it was FREE?!?

Negatives: You have to project the program through the whole day. I personally have tons of other things that I need to use that technology for throughout the day. However, I could see it being very effective in the upper grades where there aren't as many technology additives.

The whole class sees how many points each other does or doesn't have. I also felt like they were just watching the class dojo screen instead of paying attention to my lesson or their center....

Make It Monday: Candy Jar

I know that everyone else teaches an entire class of perfect little angles! I, however, do NOT! Don't get me wrong, there are one or two little angles in my class but the rest of them, not so much...

For the rest of the little brats, I have found that candy is a big motivator. So for this make it Monday I will show the making of a sweet candy jar.

Super east steps:

First go to Walmart and get a medium sized (2quarts) cracker jar for $4.49. I know they probably sell something at Michaels, Joanne's, etc but I'm a Walmart girl what can I say.

Then get some puffy paint for $.97 each.

Now go home and decorate to your little heart's content. I put candy jar and Ms. Kirby on alternating sides (because this is one of my wonderful intern's parting gifts).


Thursday, February 16, 2012

Prepare Yourself!


There!  Now you know my secret...I have the most cluttered teacher closet EVER!  You really can't even walk in there!  I know, I know, it's bad.  This is actually after a little sprucing up too... 
                                      
Scary right!  Well now you know why I truly needed to join in on the clutter-free classroom challenge

I took this other picture to redeem myself in your eyes.  This is 1/2 of my classroom library.  The rest of my classroom really is organized I promise!  I just happen to shove everything that I don't want my students, parents, fellow teachers, administration to see in the closet...Quite frankly after these pictures hit the internet I want to shove myself in the closet...or in this hot-spring...
I started to declutter the closet too.  So soon I shall reveal my after pictures...or at least some evidence that there has been improvement....
                                                                    Clutter-Free Classroom